Theme Options
A simplified theme options that give you more customization options. These are general guidelines to perform some of the basic yet useful features of WEN Corporate Theme. ( Hint: We assume we are in “Customize” section for whole theme customization part i.e. Appearance > Customize.)
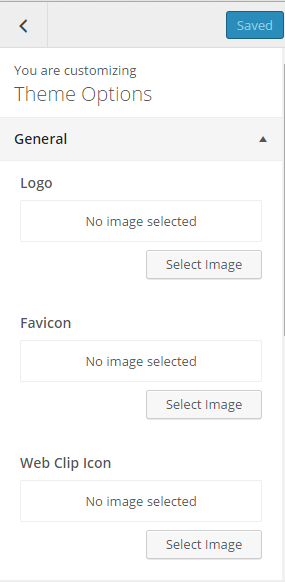
How to change logo and icons?
- From “Customize” section, go to Theme Options > General section.
- From the “Logo” section, click on “Select Image” and upload image either from your System or Media files.
- To change favicon, click on “Select Image” from “Favicon” section and upload image.
- To change Web Clip Icon ,click on “Select Image” from “Web Clip Icon” section and upload image
- If the preview is fine, click on “Save & Publish” to apply recently uploaded logo.
How to change layout of site?
- From “Customize” section, go to Theme options > General section.
- Change “Global Layout”. Options available: “Right Sidebar”, “Left Sidebar”, “No Sidebar”
- Click on “Save & Publish” to save the changes.
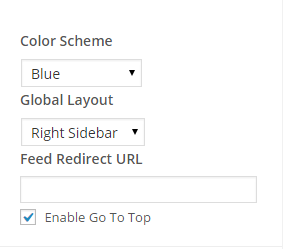
How to enable / disable Go To Top button?
- From “Customize” section, go to Theme options > General section.
- Turn on / off “Enable Go To Top” to enable / disable.
- Click on “Save & Publish” to save the changes.
![]()
How to change color scheme?
- From “Customize” section, go to Theme options > General section.
- Choose color between “Blue” and “Chocolate” from “Color Scheme” section.
- Click on “Save & Publish” to save the changes.
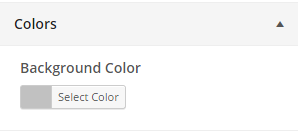
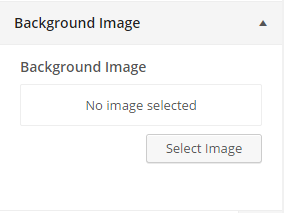
How to customize background?
- From “Customize” section, go to “Color” section and select appropriate color from color palette.
- From “Customize” section, go to “Background Image”, click on “Select Image” and upload image either from your System or Media files.
- Set additional options include “Background Repeat”, “Background Position” and “Background Attachment”.
- Click on “Save & Publish” to save the changes.
How to change header layout?
- From “Customize” section, go to “Theme Options > Header” section.
- Choose between the available header layout option.
- Click on “Save & Publish” to save the changes.
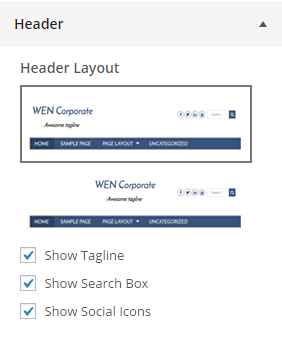
How to show search Box in Header?
- From “Customize” section, go to “Theme Options > Header” section.
- Turn on “Show Search Box” checkbox to show search icon.
- Click on “Save & Publish” to save the changes.
How to show social icons in Header?
- From “Customize” section, go to “Theme Options > Header” section.
- Turn on “Show Social Icons” checkbox to show social icons. (You need to create social menu and assign it to “Social”)
- Click on “Save & Publish” to save the changes.
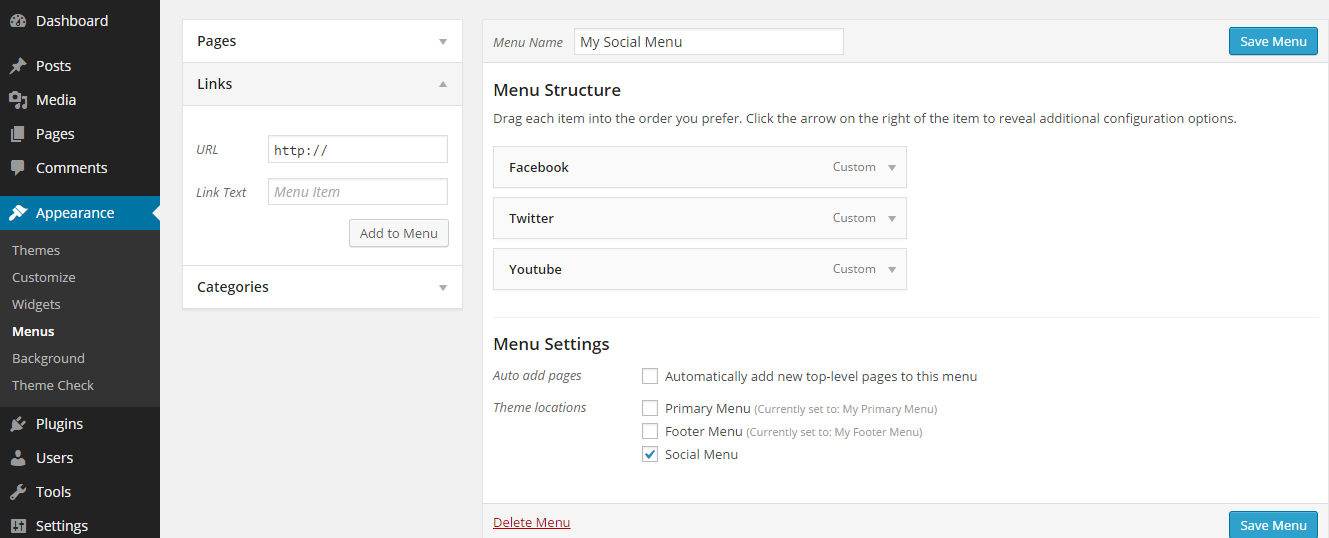
How to create social menu?
- In the admin section, go to “Appearance > Menus”
- Click “create a new menu”
- To add social link, click “Custom Links” and enter social link URL. Click “Add to Menu”
- In “Theme Locations”, choose “Social Menu”
- Click “Save Menu”
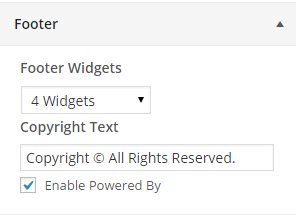
How to change copyright text?
- From “Customize” section, go to “Theme Options > Footer” section.
- Modify “Copyright Text”.
- Click on “Save & Publish” to save the changes.
How to customize blog display?
- From “Customize” section, go to “Theme Option > Blog” section.
- Choose option between available “Blog Layout” settings.
- Click on “Save & Publish” to save the changes.
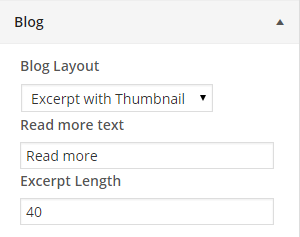
How to change post excerpt length?
- From “Customize” section, go to “Theme Option > Blog” section.
- Add/change integer value (number of words) for post excerpt length in “Excerpt Length” setting.
- Click on “Save & Publish” to save the changes.
How to add image slider?
- Firstly, you need to create a category for slider images. Go to Admin Dashboard.
- Navigate to Posts > Categories.
- Create new Category.
- Add posts having featured image to the relevant category.
- From “Customize” section, go to “Theme Options > Slider”.
- Set “Slider Status” to “Enable”.
- Choose slider display option from “Slider Display” setting.
- Select relevant “Category” from “Slider Category” setting.
- Customize other slider settings options “Number of Slides”, “Transition Effect”, “Transition Delay”, “Transation Length”.
- Click on “Save & Publish” to save the changes.
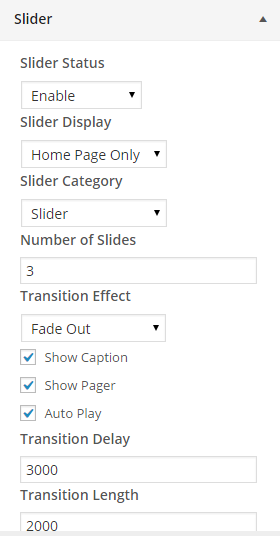
How to change image Slider
- Select relevant “Category” from “Slider Category” setting.
Widgets
Several widgets are available in the theme
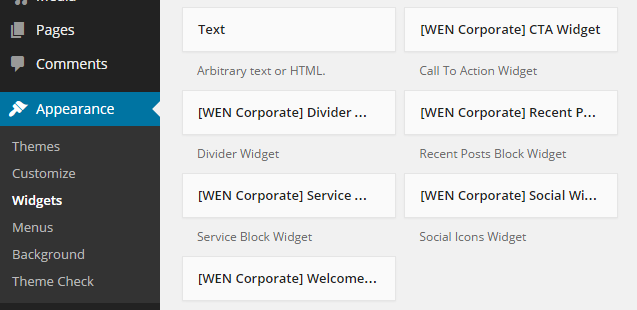
Welcome Widget
Simple widget used for displaying welcome title and message
Widget parameters
- Title: Welcome text
- Description: Welcome Message
Call To Action (CTA) Widget
Widget used for displaying message along with CTA button
Widget parameters
- Description: CTA Message
- Button Text: CTA button text
- Button URL: URL for CTA button
Recent Posts Block Widget
Widget used for displaying recent posts items in carousel
Widget parameters
- Title: Widget title
- Category: Category from which posts are fetched
- Number of posts: Number of posts to be displayed in carousel
- Show Post Excerpt: Enable / disable excerpt
- Excerpt Length: Length of excerpt (in words)
- Show More Button: Enable / disable read more button
- More Button Text: Text to be displayed in read more link
Service Widget
Widget used for displaying services posts
Widget parameters
- Title: Widget title
- Service Category: Category from which service posts are fetched
- Number of columns: Select number of columns in which service posts are displayed
- Number of posts: Total number of posts to be displayed
- Show Post Excerpt: Enable / disable excerpt
- Excerpt Length: Length of excerpt (in words)
- Show More Button: Enable / disable read more button
- More Button Text: Text to be displayed in read more button
Divider Widget
Widget used for displaying divider line
Widget parameters
- No widget parameters
Social Icons Widget
Widget used for displaying social icons
Widget parameters
- Title: Widget title
- Location: Location for the widget (Ex: Sidebar, footer column 1, footer column 2 etc)
First create the social menu from (Appearance>menus) and assign the menu here.
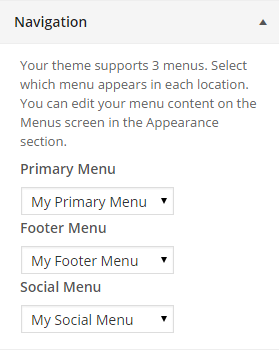
Navigation
Manage navigation
This theme support three menus, they are primary menu, footer menu and social menu. Menu you want to display in each location select from here.
- Primary Menu: Menu displayed on the header of theme
- Footer Menu: Menu displayed on footer section.
- Social Menu: Menu used for Social link.
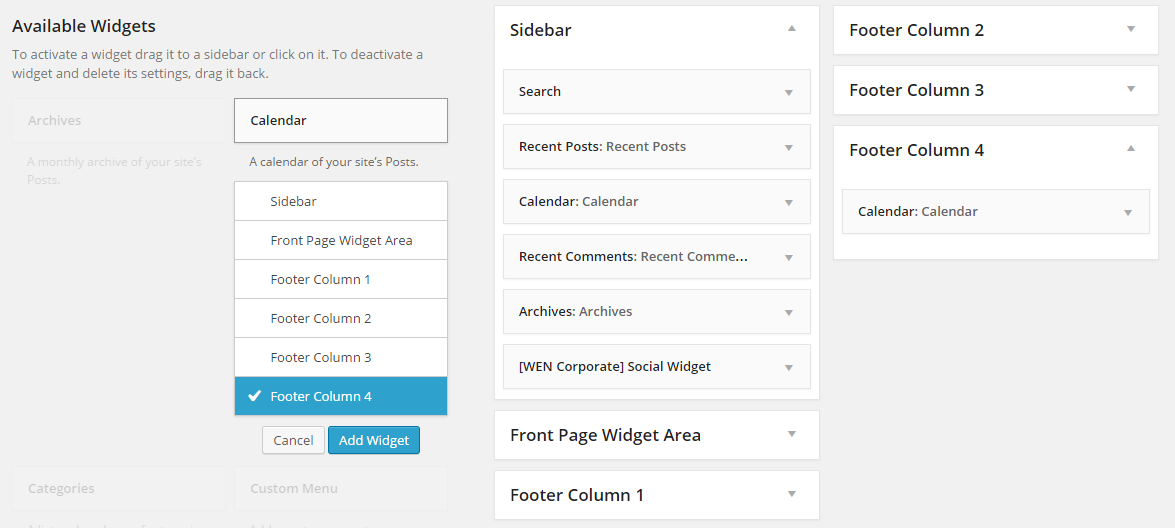
Footer widgets
Change footer widgets
On this theme there are five widgets location. They are Sidebar, Footer column 1, Footer column 2, Footer column 3 and Footer column 4.
- Go to Appearance >widgets
- Drag and drop or add the widget on widgets location
Necessary widgets and its location can easily manage from there. For example, you need “Search” widget on Footer Column 4, drag and drop or select the search widgets and choose Footer column 4 and click “Add widget”. Now the widgets appeared in the footer column 4 in front end.